In many industrial processes, the measurement of level is critical. Depending on the nature of the material being measured, this can be a simple or complex task. Several different technologies for sensing level are briefly explained here.
Direct Method of Level Measurement
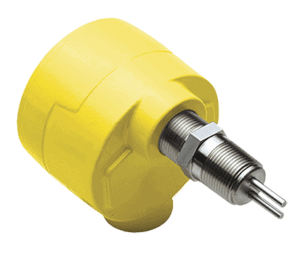
The direct method of level measurement calculates levels instantly using physical properties, like buoyancy and fluid motion. Beginning from the simplest, the following are the three main types:
- Sight glass type
- Float type
- Magnetic level gauge
Sight glass measures liquid in tanks. A scaled glass tube with metallic covering it is attached to the top and bottom edges of the tank and, as the liquid moves up and down, the level in the tube fluctuates in the same way.
Float type measurement makes use of buoyancy: a float device follows the liquid level while sitting atop it. As the liquid moves so does the float device; a cable, attached to the top of the device, is rigged to a calibrated scale with a pointer in the middle. The up and down movements pull the string which pulls the pointer, thus showing where the liquid level is.
A magnetic level gauge looks like a thick thermometer and is attached to the end of a vertical chamber. This vertical chamber contains a magnetic float, a permanent magnet, which floats on the top of the liquid level in the tank.
There is one more thing also attached to the outside of the tank: an indicating scale with small metallic strips. These strips are white and red sided flippers, rotating 180° whenever the float magnet attracts them while passing over. Whenever the float magnet is above, the strips will flip red side up, indicating the tank’s level.
Indirect Method of Level Measurement
In the indirect method of level measurement, the level of a liquid is calculated by a variable that changes according to the level. There are four main types:
- Pressure gauge type
- Differential pressure type
- Ultrasonic type
- Radar type
The pressure gauge is a simple method; a pressure gauge is attached near the bottom of tank and pressure, exerted by the tank, is calculated. The gauge changes in time with the tank’s liquid pressure, and the measurement is made according to the height of the liquid.
The differential pressure method (DP method) is another widely used method in industry. This method requires a DP transmitter and a port; these two parts are connected to the external tank at opposite ends. The differential pressure in the tank is measured between the DP transmitter at the bottom and the port at the top; the output of the differential pressure calculated by the DP transmitter is proportional to the liquid level. The more liquid in the tank, the more pressure is at the transmitter; the less liquid in the tank, the more pressure at the port.
The ultrasonic method is a no-contact type. A transmitter is mounted atop the tank and ultrasonic sound waves are sent from the transmitter toward the surface of the measured fluid. An echo of the wave is calculated and the time it took for the wave to reach its end goal from the transmitter becomes its distance. The time of the length of the distance is then calibrated in terms of the level of process material.
The radar method is a no-contact type and it uses electromagnetic waves. Electromagnetic waves are sent through a transmitter to the surface of the measured material. There is a receiver toward the bottom of the tank which takes a portion of the energy sent from the wave and then reflects it back toward the surface of the medium. The reflected energy then becomes calibrated into level measurement.
Industrial level control requires deep knowledge and understanding of many process variables, such as media compatibility, interfaces, head pressures, material densities, and mechanical considerations. It’s always recommended that an experienced consultant be involved with the selection and implementation of any industrial level device.
How Cross Can Help
Cross Company Process Solutions is an authorized Solutions Partner, recognized Systems Integrator, Manufacturer’s Representative, and value-added Distributor for process manufacturers in a wide range of industries. With our focus on systems integration, process instrumentation, valves and valve repair, and many other full solutions, we can ensure your facility is running the way you need it to. Check out our products, services, and solutions to see how we can add value to your process.
As members of the Control System Integrators Association (CSIA) as well as certified solutions partners for ABB, Honeywell, Rockwell, Siemens, and VTScada, Cross Company has the the experience and expertise to optimize your process. Contact our Process Solutions Group today to learn more or to get started.


